Friday, March 28, 2014

Master Bathroom Inspiration

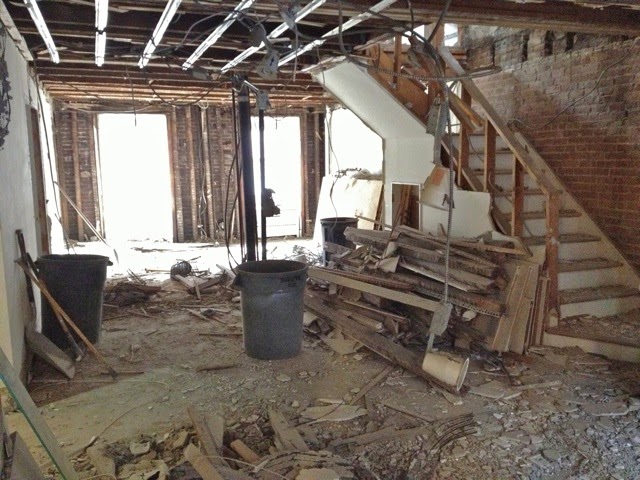
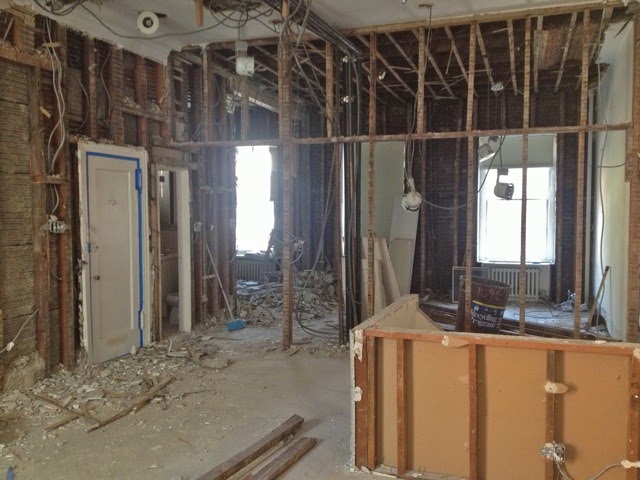
Today we had another site meeting. They have almost finished laying the plywood floors on the upper level and are working on doing the same on the lower level. The brick wall has also been removed downstairs so that it is now fully opened up. We are still waiting on numerous quotes which is somewhat frustrating as we want to get on with decision making. Some of the big questions remain, like are we going to be able to find money in the budget to relocate the pipes that run floor to ceiling in the middle of newly opened up lower level. We had planned to leave them as it will meet the bottom of the stairs and act as a divide between the living and dining space but it would be great to be able to eliminate the column completely and enhance the open feel.

I have spent every spare minute of the last week pouring over plumbing websites finalising which fixtures we are having in the two upstairs bathrooms and I am now waiting for confirmation from the plumber that all the fixtures and parts that I am ordering are correct. To a novice like me, it is so confusing making sure you have all the correct components for each fixture including valves, washers etc it's like learning a new language, much of it self-taught via good old google. We need to get the roughs ordered ASAP so it doesn't start to hold things up but I don't want to order until I'm 100% sure I've got the right things!

There weren't really many interesting shots of the work to be taken today so I thought I'd share some of my inspiration pictures for the master bathroom:


We had originally planned to buy a pre-built self standing vanity (similar but not as nice as the one on the left) online that would stand in the niche between the exterior wall and the wall that makes the side of the shower. However, after they demoed the space we discovered we were short about 3" and so the vanity I had chosen won't fit. As it turns out, I much prefer a floating one anyway but thought we couldn't afford a custom built unit but our wonderful contractor gave us an estimate today and it turned out cheaper than what I had been planning to buy, hurray! We are going to have a cupboard under each sink and a couple of drawers between them but it will still sit a good 8-10" off the floor allowing us to see the floor tiles all the way to the wall.


I love the bathroom on the right with a really bright, airy feel, floating vanity, wall mounted taps and a large mirror. During demolition, we have discovered an alcove inside the brick wall which will be perfect for a couple of recessed shelves on one side of the sinks.  


These floor tiles from Made a Mano were my obsession early on in the research phase. However, after discovering they were made in Italy from a special material called lavastone.... well needless to say they were well out of our budget, but aren't they beautiful?!

After trying and failing for a long time to find a suitable substitute for the above expensive tile I changed tact and came across this bathroom (below) featured here on Remodelista. It inspired my choice of carrara marble for the floor and I also love the large mirror with shelf below and the simplicity of the lights (which after a lot of digging I found can be purchased here). We have decided to go with slightly larger floor tiles - 4x12" and lay them in a herringbone pattern with a grey grout which will hopefully be easier to keep clean than white. I'm still deciding whether to take them all the way to the wall or to have a border and what to do about the baseboards... more decisions to come.


Sunday, March 23, 2014

More Demo, More Dust

Entryway through into the old office.
This week the demolition continued. They have completed about 95% of it and on Friday even the floors were exposed enabling us to look right through the joists from the basement level through to the parlour. Whilst we were there, they were in the middle of laying down new plywood planks to serve as a temporary floor. They had also totally opened up the entryway removing the walls on both sides so you could look left out of the window and right to the bathroom. 

Generally, the GC and architect are pleased with the condition of the joists and remaining structure which is a huge relief however, we are going to have to call in a structural engineer to advise on a few things. This will cost a few more dollars out of the contingency fund but I suppose it's better to be safe than sorry especially where structural issues are concerned. 


The old living room/future master bedroom
The downstairs looking rather sad and grim 

Friday, March 14, 2014

First Construction Meeting

We had our first meeting this morning on site with the architect and GC. It was so exciting as the space is now almost fully opened up. Touch wood, they haven't uncovered any major issues so the discussion was really about timings moving forward and making lots of layout decisions. Here are a few demo photos. You'll have to excuse the poor quality, the dust made it really hard to photograph:

Downstairs:

Looking toward the garden:


Looking toward the street:


Parlour Level:

Bye bye grotty bathroom:

They have already put up new framework for the dividing wall between the 2 spare bedrooms upstairs. These 2 windows were previously both in our bedroom but we have moved the wall over so the bedroom on the left will have 2 windows instead:


Thursday, March 6, 2014

Demolition Begins

After a couple of days of demo I can't believe how much has changed already. They have begun work on the parlour floor and have already knocked through the big dividing wall that separates the bedroom from the living space and stairs. It so exciting to see the building beginning to open up. Here's the first look photo standing in what was the living room looking through to the bedrooms:


Saturday, March 1, 2014

Starting Point - Upstairs

Here are the before photos from the parlour level floor.

Lets begin with the Living Room:


This lovely room was one of the major selling points of the apartment for us. It benefits from the soaring high ceilings of the parlour level and 2 huge windows that over look the garden. It also has a marble fire place which, though the surround is not really to our taste, (we'd prefer something a little lighter and less morbid looking) it makes an awfully cosy fire in the winter. We decided that this room would become our master bedroom after much (like 3/4 of a year) agonising over whether or not we wanted to open up the upstairs and have our living space take advantage of the high ceilings and light, we concluded that ultimately, it's best to have the living space downstairs with direct access to the garden and the bedrooms all upstairs.

Laundry Room:


Just off the living room is a small annex that contained a washer and dryer and lots of shelving and hanging space. When we first moved in I was in absolute heaven having dealt with the typical New York way of shared or public laundry facilities for the previous four years. This laundry room was particularly luxurious with all it's space for hanging and folding but we thought the space could be better used. It will now be reborn as our new master bathroom. However, we are certainly not sacrificing having a w/d in the apartment and are relocating them to a new cupboard between the two other bedrooms on this floor, a little compromise on space for laundry but the huge advantage of a new third bathroom that is ensuite to our bedroom.

Small Spare Bedroom:


This room is a very compact 9x9' and for the last year has been a perfect space for me to paint in. However, it would make a very small bedroom and I also cannot fail to point out the window. Yes, it is a window, despite not being able to see through it. My guess would be that it's never been cleaned and it is pretty impossible to clean as, like all the windows on this level, there is a separate storm window on the outside. Coupled with the fact there is the A/C unit bolted in place you can't open or close it, or get to the grimy space between the 2 layers of glass. Not ideal!


The floor around the radiator is also in pretty dire condition.

Main Bedroom:


This is certainly one of the nicest rooms of the apartment and the one we slept in. It gets lovely morning light and has a large double wardrobe. Speaking of which, here is a great illustration of how contrasting mine and my husbands approaches were to this renovation... one day we were trying to find ways of reducing the scope of work and he suggested leaving this closet as is. I pointed out to him that the doors on the upper cupboard didn't fit the cut out and that they are also hung unevenly and therefore impossible to open and close. He looked at them, shrugged and asked why it mattered when we don't use them everyday. This did not sit well with my perfectionist tendencies. Thankfully, we have both come a long way in the last 12 months!

Bathroom:


Another cramped, beige, dated bathroom. The tub/tile started leaking a couple of months before we moved out creating a puddle and peeling plaster on the ceiling of the office underneath. Time to renovate!