Showing posts with label Garden Level. Show all posts

Wednesday, August 13, 2014

Tiling Update

The tile guys have been busy this week installing the entryway tile, laundry cupboard floor tile and grouting the two upstairs bathrooms. It's not complete yet but here are some progress shots:

Black and white "circulos" cement tile going
down in the entryway

Boring but functional laundry floor

Pretty pennies, grouted but not yet cleaned up

Master Shower, floor tile not yet grouted
but subway is done and drying


Thursday, August 7, 2014

Paint

Who knew that choosing paint was so very difficult?! I thought it would be challenging, I knew there were many many shades of seemingly very similar shades, but, I wasn't prepared for a) how expensive the samples are (Benjamin Moore have recently stopped doing their 2oz sample pots and instead you have to buy a quart for anywhere between $6.99 upwards depending where you buy it) and b) how different the samples look when you put them on the wall surrounded by very white primer and then again once the whole wall is painted. 

Long story short, after painting little squares all over various walls, we have decided to go very neutral pretty much throughout but especially with the living space downstairs to maintain the "modern Scandinavian" feel from the white tinted floor. Now you may look at the colours below and think they are all the same (my husband certainly did!) but I promise you, on the walls, they are very different! Not wanting to be called boring and go all white, we have chosen a very very pale grey for the walls and crown downstairs - BM Winter White, and a slightly darker light grey for the all the trim including windows, shutters, baseboards etc - BM Paper White (anything to avoid the dreaded beigy magnolia feel of the 90's!).

Paper White OC-55
Winter White OC-21

To add a little interest and to tie in the dark from the steel on the garden doors and the staircase we are painting the kitchen island in Ink Black, which is really more of a dark blue/charcoal. The perimeter cabinets will match the trim in Paper White. More of the kitchen inspiration here.

Ink Black
Upstairs will continue the neutral theme with the Paper White in the hallway and the nursery and a slightly warmer shade - Classic Gray OC-23 for the master bedroom. All the upstairs trim will be White Heron OC-57 (I found the go to White Dove far too yellow).

White Heron
Classic Gray
In the guest room I thought Cement Gray 2112-60 was going to be a winner until I painted it on the walls and it read as almost lavender. So just to be difficult, I decided to neutralise the purple with a 50/50 mix of Balboa Mist OC-27 which worked perfectly.

Balboa Mist
Cement Gray
I am still working on the entryway and powder room colours which is driving me a bit mad. Hopefully it will be sorted soon!

Friday, August 1, 2014

Kitchen Cabinet Colours and Hardware

As well as driving myself crazy with paint samples, picking out all the wall colours, I have been trying to select colours for the cabinets in the kitchen… a challenging task when there is nothing at all in the space to look at! 


I love the look of this kitchen with the dark cabinets and brass hardware so we have decided to paint the island dark and keep the perimeter cabinetry on the lighter shade so it's not too overpowering. I love the look of the brass on the dark and have fallen in love with these drawer pulls and knobs from School House Electric but they are so expensive so I'm on the hunt for something similar in a lower price bracket.

SHE "midcentury knob"
SHE "Edgecliff Pulls"

Thursday, July 31, 2014

Wood Floor Stains

We have been selecting floor stains. Our inspiration was all based around the Scandinavian, very pale, mat finish, natural wood look. I did a lot of research as to how to achieve this look and came up with many different suggestions all with various reviews and positives and negatives. At the end of the day, we don't want to have to be redoing our floors ever few years and with a baby on the way we aren't kidding ourselves that we are going to be particularly careful with them either. So, an oil based polyurethane finish was suggested. However, I was wary of this as oil based finishes tend to yellow and also have more of a sheen to them, the exact things I was trying to avoid. So our contractor suggested an oil based stain followed by 2 coats of water based poly. This sounded like a better plan.


We chose DriFast's Stain in "white" as it appeared the most natural and didn't bring out the pinkish tones of the oak. Unfortunately we had to do 2 coats as the first didn't absorb evenly so it's a little whiter than planned but still looks great. This photo shows the 2 coasts of stain and first 2 coats of poly. It's now all been covered so the rest of the work can continue and at the very end they will do another 2 coats of poly for extra protection. You can also see the new stairs have been temporarily installed.

Thursday, July 3, 2014

Progress

We've been away for a week which is always nerve wracking when you have a renovation going on back home. Being the control freak that I am, I don't like to leave the crew "unsupervised" for too long but this time I was astonished at the progress made whilst we were away. I had a real "WOW" moment when I walked in this morning. The downstairs has been transformed with 99% of the sheetrock installation complete and much of the upstairs is now primed ready for painting. The new wood flooring is also being laid upstairs and many of the ceiling light fixtures have bulbs attached giving a much better sense of the quality of light throughout. It is suddenly getting exciting again and I have a whole new long list of to do's including picking out paint colors.

Looking through to the dining room from the living room

Kitchen

Friday, June 20, 2014

Let There Be Light

The moment we've been waiting for for 18 months since we purchased the apartment finally happened this week - the knocking out of the back wall. I felt equally excited and nervous about it seeing as there are 5 stories of brick above it that needed supporting. Luckily however, our structural engineer did indeed seem to know what he was doing and it all went smoothly.  After all the meticulous planning and months of waiting, the actual method of bashing it down with a sledge hammer did seem rather rudimentary but who am I to judge! Here is the before and after...


Before: With the newly installed steel support beam.

After: Light glorious light!

Friday, May 23, 2014

Recessed Ceiling Lights

A quick follow up on my last lights post. Our contractor was suggesting using this type of 4" recessed ceiling light and we had planned to have 9 in the living room, 4 in the kitchen and 4 in the dining space. However, after seeing a sample of one of these this week I realised  that this wasn't at all what I had in mind.


The type that I'd been picturing are smaller - 3", and more streamline as they don't have a space between the bulb and the casing.  They can also be angled if you want to aim them at something specific like a painting:


However, what I have learnt is the this type does not give off as much light as the bulbs are much smaller and we will therefore need more. A a quick visit to some of the Chinatown lighting shops confirmed that we definitely prefer the smaller design so we have reconfigured our lighting plan to include 12 in the living room, 5 in the kitchen and 6 in the dining area. We have also had to educate ourselves on the pros and cons of LED vs halogen which I really knew nothing about.  Luckily, the lights we have managed to find  (thanks to our GC) are actually cheaper than the original ones spec'd out so it's not going to cost any more, phew!

Monday, April 21, 2014

Floors Down, Framing Up

So, where are we? 


Well, we now plywood covering the floors pretty much throughout, the downstairs bathroom has finally been ripped out (good riddance!) the old brass pipes running from the cellar have been replaced with shiny new copper, the old cloth covered wiring has been cleared out and updated in the cellar, we have 2x4's studs up framing out the master bath and all the closets upstairs and the office and finally, we made the decision not to move the column of pipes at the bottom of stairs. 

Office
Master Bath
This last one had us "umming and arring" for many many days but ultimately we came to the conclusion that it was an awful lot of money and way too much risk of disruption for our upstairs neighbours = big headaches for us!


Shiny new copper pipes


Wednesday, April 16, 2014

To Move or Not to Move the Column of Pipes?

This decision has us in a real conundrum. When we opened up the walls we discovered a collection of pipes running through both our floors from the cellar to the apartment above. The pipes consist of a waste line, a steam pipe and several water risers. The problem is that they run through the middle of the downstairs space, like, right in the middle. (Sorry about the terrible quality photo).

They are located near what will be the bottom of the stairs between the living and dining space. We have had a quote from the plumber to relocate them but it is, unsurprisingly, very expensive. We are also very concerned about  the impact moving them will have on our neighbours who already have had their fair share of issues to deal with due to our construction. These pipes feed their space so it would involve shutting off their water again which caused several issues the first time we had to do this, and I have concerns that relocating the steam pipe may lead to the dreaded tick tick ticking (or worse, banging) of the steam heat which we don't currently get.

Whilst it would be lovely to be rid of these and completely open the space, there are also advantages to keeping them. Not just the saving in money but if we enclose them in a column and integrate this with the bottom of the stairs it acts as nice divide between the living and dining space whilst still keeping the area open plan. We have a lot of thinking to do!

Monday, February 24, 2014

Our Starting Point - Before Photos of the Garden Level

Yesterday I finally took a whole stack of "before" photos. I think it's important to have a record of where we started and hopefully one day we will look back on these and realise  how far we've come.


Obviously, I took many more than you would want to see so I have tried to narrow it down to just a one or two of each room to give a good idea of where we are starting. Remember we have been living in the apartment for a little over a year whilst we finalised all the plans. I could show you the really gruesome "before we moved in" pics, complete with spider webs, filthy floors, mouldy grout and crumbling paint but maybe I'll save those for another time!


Garden Level:

Entryway:
Dark and dingy with a stone floor that is uneven and tricky to clean up all the grit, snow and dirt that gets traipsed in. Pretty darn boring an entryway.


 Downstairs Bathroom:
Does it really need a description? Dark, grungy and all shades of beige, in need of serious love and updating. It had a large shower but really pathetic water pressure that meant you had to sort of crouch under the shower head, right up against the wall. It's only redeeming feature that it has it's own window, somewhat of a rarity in Brooklyn townhouses, although I'll save you from a close up with this scary looking specimen, with its rotten, mouldy frame.


Living/Dining Room:
It's pretty dark down here as the only light source comes from the 2 french doors at the end which are each covered by an iron gate. Yes that is an A/C unit that you spy bang smack in the middle of the wall between the doors - just the thing you want to look at whilst relaxing by the fire. Speaking of the fire, it's a real wood burning fireplace, all be it with a rather dodgy looking raised brick hearth covered in slate tiles. One of 2 fireplaces in the apartment and a big draw for us when we were originally looking around.


Kitchen:
More beige. This dark and dated galley kitchen actually had a surprising amount of storage space and a couple of redeeming features like the small Viking range and nice deep sink. However, the plan is to move the kitchen to the opposite end of this floor so it's all got to go.


 Unfortunately the cute little kitchen window, doesn't let much light in:


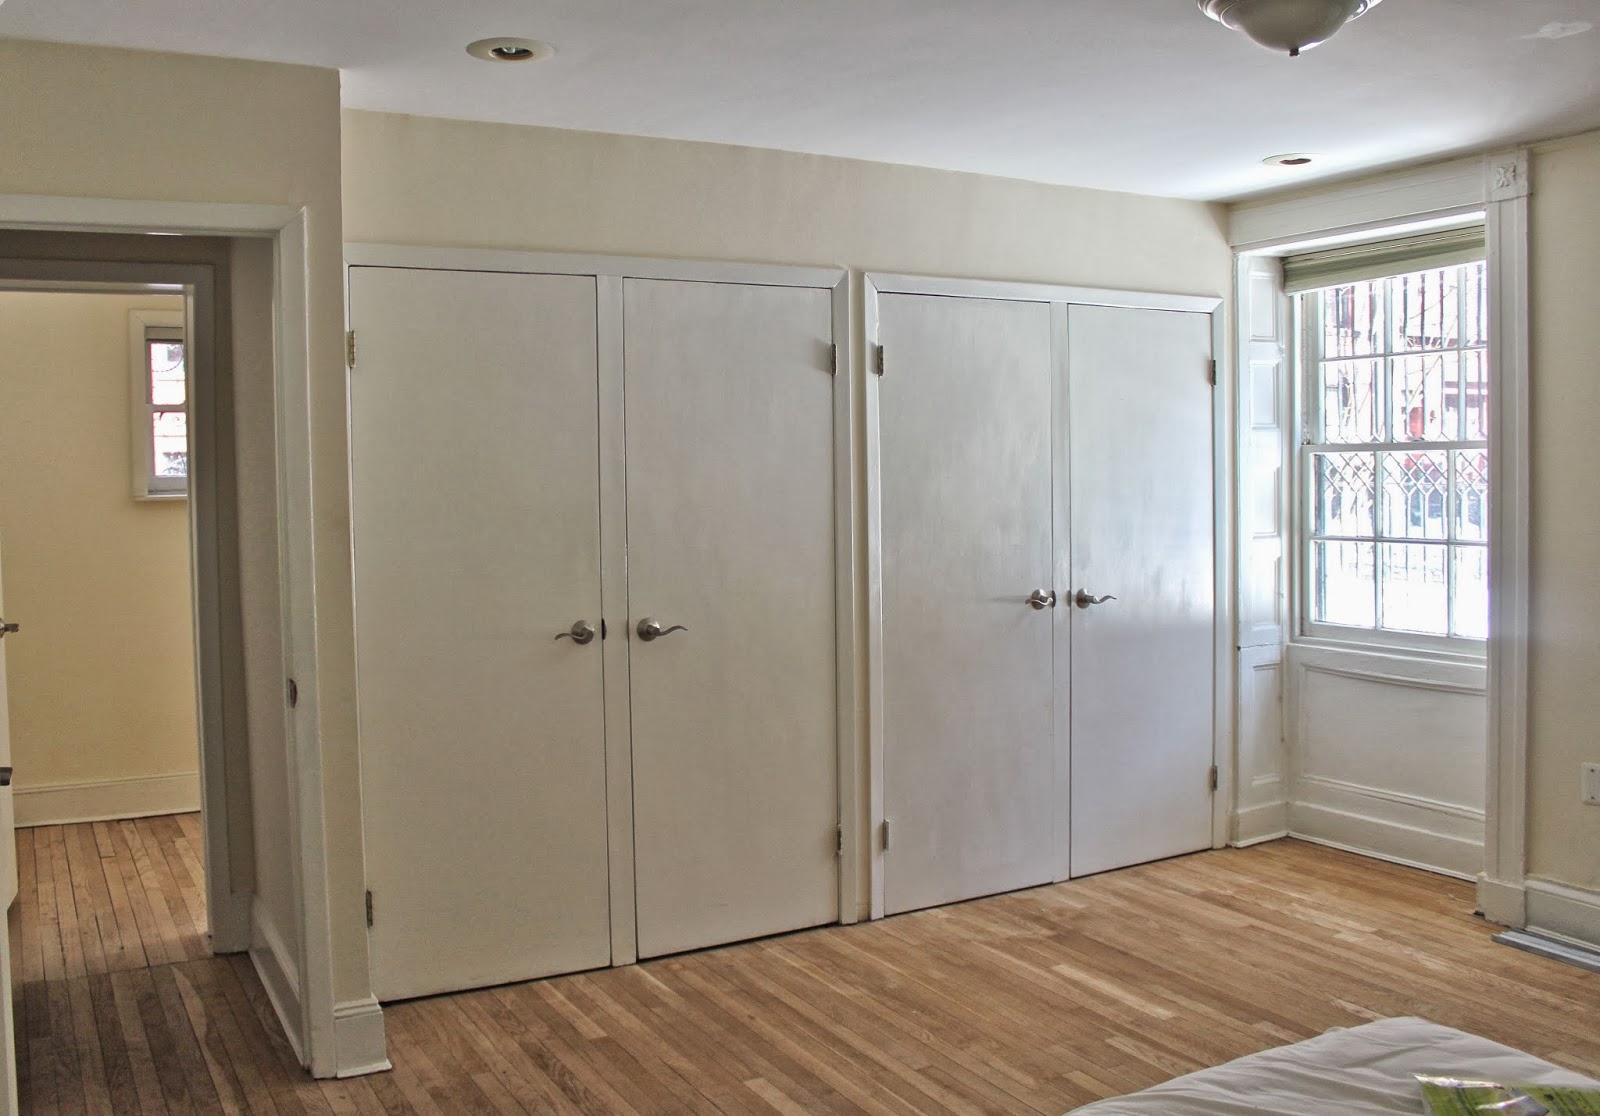
Large Spare Bedroom:
This bedroom gets great eastern light in the mornings despite being on the street level. It is a large room and we really felt that it was wasted space to have such a large spare bedroom. It's also not idea as you can see right in at eye level from the street so, private, it is not.


Small Spare Bedroom/Office:
This little room is just over 6 feet wide and for the year we lived here pre-reno, we used it as an office space. Again, it gets great eastern light all morning and it actually has a second small north facing window that helps make it feel a little larger and brighter.